Wednesday, February 25, 2015

LomoKino Super 35mm Camera Review

I’ve been excited about the Lomokino since I first heard of them from their crowdfunding campaign. Admittedly, I forgot about it for a while. But recently I saw it on Amazon, and decided to pick one up.
The Lomokino is a hand cranked Super 35mm movie camera that takes traditional 35mm still camera rolls of film. As anyone who knows me can attest, I am a film nut. So the thought of being able to shoot super 35mm motion pictures, and develop it at home was exceptionally intriguing.
To be honest, the Lomokino was probably designed to be a quirky toy for hipsters. A way to shoot “old style” movie clips. However, I see much more potential in this little device. A 35mm movie frame has a left to right. Grain to pixel equivalent of about a 30 megapixel digital camera. However, the average film stock has 10 layers of emulsion deep. Making a 35mm movie frame closer to the equivalent of a 350 megapixel digital camera. (4k video is approximately equivalent to 5 megapixels). This doesn’t even begin to account for the subtle organic flow of film grain as opposed to the harsh uniformity of digital pixels. Film is a far better (although far more expensive) medium. Although I have fully embraced digital as a cost effective substitute for film, shooting film is still better.
However, the Lomokino does have some serious disadvantages. First, is the cranking mechanism. The lomokino will shoot 5 frames per second if cranked rigorously.  This slow frame rate closer resembles a flip book then a movie. Stylistic qualities aside, I would like to see a version that can shoot 15 frames per second. This would allow it to reach persistence of vision, and make for a much smoother end product. I understand the manufacturers reasoning behind the slow frame rate. 5 frames per second gives the user about 30 seconds of footage from a 36 exposure roll of still film. 15 frames per second would only yield 10 seconds. Although the average user would probably prefer the extended time to the smoother look, it would be nice to have the option to change it. I have a 35mm Mitchel camera with a hand crank that can be set to shoot 128 frames per second, so I know it is possible to make the Lomokino shoot 15fps…
The lens on the Lomokino is not the best quality. It would have been nicer if this camera came with a standard lens mount instead of a cheapy permanently attached lens. However, it is wide enough of an angle to have a substantial depth of field making it good for the average user.
The first roll of film I shot through the Lomokino was ilford 400 speed B&W film. (I later processed it at home and scanned the negative using a Wolverine 20 megapixel negative scanner) The cranking mechanism wasn’t very fluid which resulted in a lot of camera shake in my finished footage. I will try different ways to hold the camera, and let you guys know what works better.

If you are into film making, celluloid, or a just a trendy hipster wanting to do things the “old-fashioned” way, You should pick up a Lomokino camera. For the professional film and video maker, it is a cheap back up that can get you some striking images when you don’t have power or a charge to your regular devices. For the indie / experimental film maker it is unique style that will set your project apart from the deluge of digital films. And for the film aficionado, it is an inexpensive way to shoot real motion pictures with a tangible roll of film.


Wednesday, January 7, 2015

Canon 24mm EF-S Pancake Review

I recently saw that Canon had released a 24mm EF-S f/1.8 Pancake lens. I was very interested in this lens. I have a full set of Nikon and Canon FD primes, but my EF prime selection is lacking. Seeing that Canon released a low cost, wide-angle “pancake” lens was just the push I needed to expand my EF’s.
The First thing you will probably notice about the Canon 24mm EF-S lens is the slim profile. This is achieved by the use of one aspherical element in the lens' construction, which helps to minimize chromatic aberrations and produce notably sharp images. The slim “pancake” profile of the lens also allows you to use the lens in ways (and places) you cannot with a standard sized lens.
The second thing you will probably notice about the Canon 24mm EF-S lens is the price. At $150.00 it is ¼ the price of the standard Canon 24mm EF lens and is really only lacking in the EF lens’s Image Stabilization.
Once I got my hands on the Canon 24mm EF-S, I took it down to the beach to shoot some photos. I immediately noticed how fast and quiet the auto focus on this lens is. This is the result of Canon’s Stepping motor (which I learned can easily be overridden by turning the manual focus ring without needing to switch the lens to manual focus).
The photos came out sharp and very nice. This gave me an idea, and I quickly rushed of to do a comparison between the Canon 24mm EF-S and my other 24mm prime lenses (a Nikon Nikkor 24mm, and a Canon 24mm L-series FD).  To use the other lenses on my Canon T2I, I use fotodiox adapters. The one for the FD adds a piece of glass that cuts light and a bit of sharpness as well as increasing the focal length a bit (although that never stopped the L-series 24mm from being one of my favorite lenses).
Below I have added a photo from each of the three lenses, and as you can see, the Canon 24mm EF-S Pancake holds up surprisingly well against it’s more expensive partners.


Another great advantage of the Canon 24mm EF-S lens is it's great macro abilities. Canon claims the ability of this lens to focus on object about 6 inches from the lens. This photograph of some sailboat rigging seems to verify that claim. the photo has remarkable color clarity, and sharpness.
Overall, I would have to say that if you shoot with a Canon APS-C camera, the 24mm EF-S lens is good addition to your lens collection. It may, in fact, become my new “goto” wide-angle prime lens.

Have you tried the Canon 24mm EF-S prime lens? If so, tell us what you think in the comments below!

Wednesday, May 29, 2013

Shooting with a Probe Lens

Innovision Probe Lens System

So I have this Innovision Probe lens from back in my days doing Visual Effects for TV and Movies. I have an adapter to use it with the old Canon FD mount. I also have an FD to EF adapter. So I decided to sick this on my Canon T2i and see what would happen.
There are 3 lenses in this particular set that I have, but for todays shooting, I stuck with the 16mm. All three "lenses" screw to the front of the unit, but the focus ring, and iris are all closer to the camera side. Wide open, this lens system is a very slow T-16.
("t" as opposed to "f". This was a cinema lens so it uses the "t-stop". A simple explanation of the difference is: f-stops are mathematically figured by a ratio of the focal length of the lens divided by the aperture diameter. A t-stop includes in the calculation the light loss caused by the light passing through the element. A more detailed explanation is available here. )
Door Track

To be honest, I hadn't put much thought into shooting stills with this. I guess it saw it more as a gag to move the camera through impossibly small places in a movie, and not very useful in a still. Then I thought that the extra couple feet in front of the lens might make for some unique points of view. And in the end, isn't that a great part of photography? showing people things they see all the time, in a way they have never seen them?

This First photograph is from within the door track to the part of the sliding glass door in my apartment that never gets used (and is in fact behind the couch).  The shallow depth of field, and unique perspective really stood out in this photograph to me. (After shooting this, I am seriously thinking of hiring a cleaning service)

Shooting a piece of Coral
The weight of this lens is pretty intense (especially for my plastic bodied Canon T2i , it may not be a concern on a metal bodied camera like the 7D , or 5D ). I shot these photographs with the camera either on the floor, or a desk. I also carried it by the lens so that the weight of the lens wouldn't put undue stress on my lens mount. In the first photograph of the unit (in the case, at the top of the page) there is a cradle system for the lens. I need to figure out how to rig that to work with this camera body before I do a lot more shooting with this system.

To the right, is the Photograph taken in the setup above. I was amazed at how close to the lens I could get, and still achieve focus. (The out of focus area in the foreground was able to be focused on at less then 1/2 an inch from the front of the glass, but that photograph wasn't as ascetically pleasing as this one so...).

So now to think of new ways to play, and new things to photograph with this lens system. If you have any ideas, post them in the comments section.

iPhone close-up
* Check out my other blog for some real cool vintage photos
If you like Exotic Cars, I have some pics of those over here
view my website daviddefino.com
buy my prints at Deviant Art
buy accessories with my photos
follow me on twitter


Tuesday, March 26, 2013

Shooting Regina Bailey

I have been neglecting this Blog. I became to focused on trying to come up with a "lesson", that I stopped writing all together. Well, I think I'm just going to post some pretty pictures and ramble a bit instead. I recently upgraded to Adobe Creative Suite CS6, and was getting used to the new Photoshop (my previous version was CS2 I believe). I found myself looking through files of photographs looking for stuff to play around with in Photoshop, and as I often do, I ended up in my Regina Bailey Folder.
Regina is an amazing Model that I have known for quite some time now. I have never been much for commercial photography, and have actually tried to avoid it at many times in my life. For me, Photography is therapeutic. Clients usually just annoy me. I am, however, usually available to shoot for friends. As a result, I have many wonderful photographs of Regina. I figured I would share a few with you. The Photo at the top of this page is a favorite of mine. The soft, dark, blues and greens in the background offer a contrast to the bright warmth of Regina's face. Her maroon top balances her warmth and the cool of the background. Her eyes gaze off, up into the distance. This photo was shot digitally.
The photograph on the right was shot on 35mm B&W film, processed and printed by me. I love the playfulness of this photograph. She walks into the chaos of light and shadow ahead. Briefly pausing to turn back, giggle, and beckon you to follow. Her eyes turned down shyly bring a feel of youthful curiosity as to what lies ahead in the darkness.
This next shot was also on B&W film. I think this was 6x4.5, but I'm to lazy to go dig for the negative to say for sure.
This photo makes me smile. The amazed look, as if seeing something new and exciting for the first time, and the band-aid on the head that says, "Yes,  I have been hurt, but that won't stop me"
The last photo I'm going to share in this post is a 3D photograph. Shot on a Stereo Realist Camera (that you can see me holding in mirrors reflection.). I used the two separate images from the negative to make the 3D Anaglyph (for more info on how to make 3D anaglyphs see my tutorial here).
If you look back through the posts on this blog, you will see many other Photographs I shot of Regina. If you look at my website, my Flickr, or Deviant Art sites you will find more there also. I will share more with you in the future, and over the years, I will shoot even more to share.


* Check out my other blog for some real cool vintage photos
view my website daviddefino.com
buy my prints at Deviant Art
buy accessories with my photos
follow me on twitter


Monday, January 28, 2013

Canon f/1.8 50mm review


The Canon f/1.8 50mm
 I am not a big fan of the 50mm in general. Recently, I was shooting a short film, and the director wanted a shallow depth of field, and very "minimalistic" lighting. So I was shooting at f/2.8. I was using my set of FD mount Canon primes (with an adapter). In one scene, I was shooting across a dining room table. It became apparent that my 24mm was to wide, so I reluctantly grabbed the 50mm. To my horror, the iris was seized up. I ended up getting the shot with my 85mm, and backing up a bit. After we wrapped, I knew I had to buy a new 50mm. Should a buy another old FD? I decided to look at Canons current offers (as I had no EF primes). Canon makes 3 different 50mm lenses. The f/1.2 L USM Lens , the f/1.4 USM , and the f/1.8 II . As someone who is no fan of the 50mm, (and a bit lacking in the finances at the moment) I decided to just grab the econo model f/1.8. 
My First 35mm SLR
I Think I know where my distaste for the 50mm came from. In 1993 I bought my first 35mm SLR. It was a Fujica, all manual, M42 mount, and it had a 55mm lens on it. It wasn't a bad lens, it was just the only lens I had... for 2 years. I became tired of it. Tired of the look it gave. Eventually I discovered used camera shows, and was able to afford my first zoom. I never looked back. The 50 was dead to me.
Apple Keyboard & Mouse
This New lens was different. Now I am sure the L-series 50 is an incredible lens (my 14, and 24 are L-series, and the continue to amaze me.), But for the price of the 1.8, I don't think you can go wrong. At 1/10th the price of the L-series, this is an amazing lens. If you don't have any primes, the extra f-stops will come in handy (all my zooms are 3.5). If you do have primes, then the 50mm will be a great mid focal length addition.
All of the shots in the post (with the exception of the photo of my Canon camera with the 50mm lens on it) were shot using this lens. These last three photos were shot locked off on a tripod. I was set to auto shutter speed, and 200 asa for all three shots. The first was shot at f/1.8, and the last shot at f/11. The lens was able to give a good quality image through all stops, and a good range of depth of field. I would call the Canon EF 50mm f/1.8 II Camera Lens a must have for anyone who owns a Canon DSLR.
Canon f/1.8 50mm 
* Check out my other blog for some real cool vintage photos
view my website daviddefino.com
buy my prints at Deviant Art
buy accessories with my photos
follow me on twitter


Wednesday, November 28, 2012

A Simple explanation of Persistence of Vision

I have decided to write a post about Persistence of Vision. I figure it is fitting being as that is the name of this Blog.
To put it simply, Persistence of Vision is the ability of the mind to interpret a fast succession of still images as a moving image. In the early days of Motion Picture production, it was decided that the projection of 16 still frames per second would give the appearance to the viewer of a moving image (speeds as low as 10 frames per second would still give the illusion of motion, but would have a jerky, strobe effect, much like the stick figure flip-books we played with as kids).  Most early films where therefore shot at 16 frames per second. With the advent of sound pictures, the frame rate was increased to 24 frames per second to better accommodate the audio track (which at the time was printed on the film projection print). As a result, many early silent films were later accidentally screened at 24 frames per second giving them the sped up look that many of us associate with early silent films.
Persistence of Vision example
The images above were shot in 1878 in an early attempt to study the way horses run. It is important to note that these images were taken by 10 separate still cameras triggered by mono-filament "trip lines" that the horse was running through, and were never intended to be a moving image. (This system is also the basis for the "Bullet Time" effect from the motion picture "The Matrix" that used hundreds of cameras that fired in sequence along a path thus giving not only a slow motion shot, but also a "moving camera" effect.) The bottom right image is the previous 10 images played one after the other at a rate of 16 frames per second. As you can see, the horse appears to be running smoothly even though you are actually just looking at the 10 still images being shown in rapid succession (on a loop). 
All modern forms of moving image technology still rely on these principles. Most films are still shot at 24 frames per second. Some are shot at 30 frames per second. The analog video signals we grew up with were based on 120v 60hz power that required images to be interlaced. interlacing split the frame into 2 fields with 60 fields or 30 full frames being shown per second on NTSC systems. PAL systems used 50hz power, and therefore showed the images at 50 fields, or 25 full frames per second.
There is a growing belief that showing movies at 48 frames per second will give a more realistic experience to the viewer. The 2013 film "The Hobbit" Directed by Peter Jackson will be the first major motion picture to be shot and released in 48fps.
Persistence of Vision is the basis for many "special optical effects" commonly used in the motion picture industry. Cell animation, and stop motion animation are both fine examples. Each uses individually shot still frames that, when shown at 24 frames per second, give the viewer the illusion of smooth, fluid motion.
Time Lapse photography Also uses the principles of Persistence of Vision. Time lapse is created by shooting still frames at a slow interval, and then playing them back at a higher frame rate. The following Video was shot at a rate of 1 frame every 5 seconds.


* Check out my other blog for some real cool vintage photos

view my website daviddefino.com

buy my prints at Deviant Art

buy accessories with my photos

follow me on twitter

Wednesday, November 14, 2012

Iconic Buildings in Southern California

Hollywoodland Reality
 Design has always been I subject I enjoy photographing. Architectural design has fascinated me since I first picked up a camera. It seems to me that a building is a snapshot of the design aesthetic of the time it was built. Remodeling and additions add subsequent styles into the mix adding a sometimes surreal element. The Photograph on the left is of the Hollywoodland reality office (originally the Hollywoodland sales office) built in 1923. You can find a lot of great photos and history about the building (and the Hollywood sign) on their page.
Hollywood Tower
Some buildings can be better known for their fictitious counterparts then for the real building.  The picture on the right is the infamous Hollywood Tower. Known to most people as the inspiration for the Disney Hollywood Tower of Terror ride. Of course the real building looks little like the ride. I have never actually been inside the building, but I have heard countless tales of it being haunted. I suppose the rumors of ghostly residents, along with the foreboding style of the architecture, is where Disney came up with the idea.
Pasadena Suicide Bridge
The next photograph I have today is of the "Suicide bridge" in Pasadena. Built in 1913, several people jumped to their death from this bridge in the early 20th century (and continue to do so). There is a famous story of a woman who leapt from the bridge after tossing her 3 year old daughter over. The child was the only person to ever survive the plunge. (read more about that here). This picture shows the advent of progress, and the change in style for the same structure. In the foreground is a modern freeway overpass (the Arroyo Seco bridge). Although obviously built with cues leading back to the original bridge, its style is different.


* Check out my other blog for some real cool vintage photos
view my website daviddefino.com
buy my prints at Deviant Art
buy accessories with my photos
follow me on twitter

Wednesday, October 31, 2012

Behind The Scenes Horror Fun

Elvira and Clones
 In honor of Halloween, (and I was slacking on this blog this week, and didn't have anything prepared), I thought I would share some behind the scenes horror themed photos I've taken while working on various gigs over the years. The Photo on the left was shot in 2007 during shooting of "Who Want's to be the Next Elvira". The photo was shot in a ballroom on the Queen Mary in Long Beach after a long day of shooting. The photo Features Elvira: aka Cassandra Peterson  (in the center) and two "Elvira Impersonators" on either side.
Easter Bunny Kill Kill behind the scenes

Easter Bunny Kill Kill behind the scenes
David Stamp: Someone's Knocking at the Door
 Although this is Halloween, I thought these next two pictures from the shooting of Chad Ferrin's "Easter Bunny, Kill! Kill! " would be appropriate to share. This photograph on the right, shows the death of David Stamp's character Ray. Also in the photo, you see Cinematographer Giuseppe Assaro (holding the camera), and A.D. Rachel Sever. In the background, you can see the leg of Wolf Dangler. This movie was shot in 2006 mostly in a small house in Hollywood, and a few other local locations.
One of those locations was the small store we shot the opening scene in. The photo below was from that days shoot. In it, you see Timothy Muskatell (In the mask). Behind him you can see Trent Haaga, and on the right is my good friend Key Grip Greg Ewing (who is no longer with us).
These last two pictures are from the shooting of Chad Ferrin's Someone's Knocking at the Door . I did a more in depth post about that shoot here, but I didn't add these behind the scenes photos. The first photograph is of actor David Stamp undergoing his make-up transformation before shooting his scene with actress Andrea Rueda. (Make-up Effect by Tom Devlin's 1313fx. The majority of this film was shot at the derilict Linda Vista Hospital in Los Angeles. There are many stories of that hospital being haunted, I have heard them from many a crew member, and saw some of it with my own eyes.
The last photo is from Trent Haaga's death scene. As you can see, he is checking out a shot of the same thing on his cell phone.
Trent Haaga: Someone's Knocking at The Door
* Check out my other blog for some real cool vintage halloween photos
view my website daviddefino.com
buy my prints at Deviant Art
buy accessories with my photos
follow me on twitter

Thursday, October 25, 2012

Photographic Repetition

Transamerica Building, San Francisco
"A master painting has multiple repeating threads running through it. These hold the painting together and unify it in much the same way a great symphony is tied together by a repeated main theme. Variety in these repeated elements, as in music, adds interest to the painting. Repetition, variety, unity, harmony are characteristics of all great symphonies and of all great paintings." (Barry John Raybould)
Old style Overtaken by the Modern
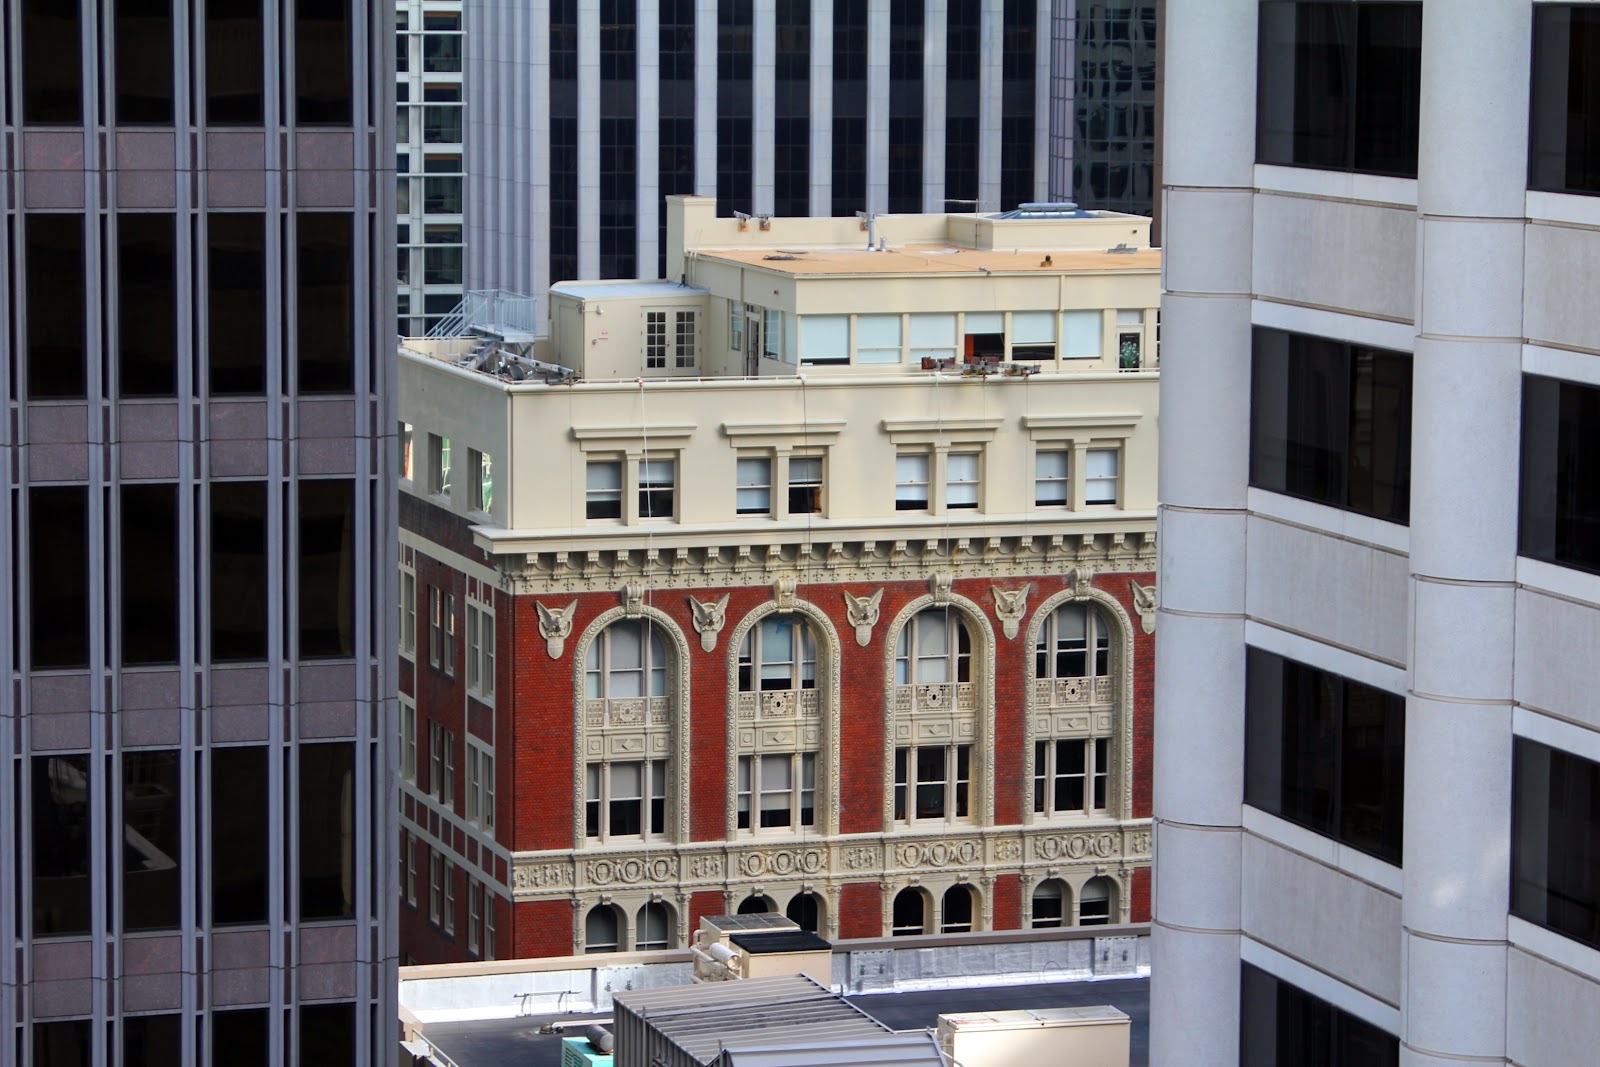
Repetition has long been a staple of any artistic medium. The uniformity soothes us. We like it when everything is organized, and lined up. Of course repetition has many uses. It can be used as the subject itself, as in the above photo of the Transamerica Building in San Francisco. Or this photo on the right that juxtaposes the repetition of the sleak modern architecture with it's singular recurring pattern, and the early modern building and its many recurring patterns in the center.
Roast Duck


Repetition can also be used to draw attention to your subject. The Photograph on the left is so cluttered with reflections, that without there being multiple ducks hanging in the window, the viewer might not know that the duck was the subject of the photograph. (Now granted, I could have used a polarizer to clear up the reflections, but I wanted the chaos of it, I wanted it to be a "through the shop window" kinda thing.)


Chinatown

Repetition does not have to be the exact same thing being repeated. In this photograph on the left, the cars, and the buildings are the repetition that create a path through the image.
Repetition can also provide a frame of reality in a surrealist view. The photo below uses the reflections in the window of a building to show a distorted view of other buildings. I used the buildings repetitive architectural cues to provide a counterbalance to the distortions.


Reflection in San Francisco
view my website daviddefino.com
buy my prints at Deviant Art
buy accessories with my photos
follow me on twitter